This an ideal tool for rendering a list of records. However, it goes beyond that as you can define which data goes where, in which column and even include rich formatted notes for each record. It is possible to use the Reports section to export, print or produce rich format documents from the Documents section.
There is a conditional filters system where you can define which records the report should display. For example: printing all the dairy entries in your Journal for the period of 1st May 2006 to 31st May 2006 with one entry per page. If you used the Journals section, you would have to navigate to each entry and do a separate print command for each document.
In the Reports sections, you just choose the predefined report "Journal Entries" then enter the date range in the conditions as "Diary date is greater or equal to 1 May 2006" and "Diary date is less or equal to 31 May 2006". Click on ![]() Run Report and you have your result. This result can then be printed, previewed, exported or even edited for more control.
Run Report and you have your result. This result can then be printed, previewed, exported or even edited for more control.
When there's a date entry required in a condition, you don't have to be exact when entering dates, you could enter "today", "yesterday", "tomorrow", "May 31", "27/02/2006" or other variations.

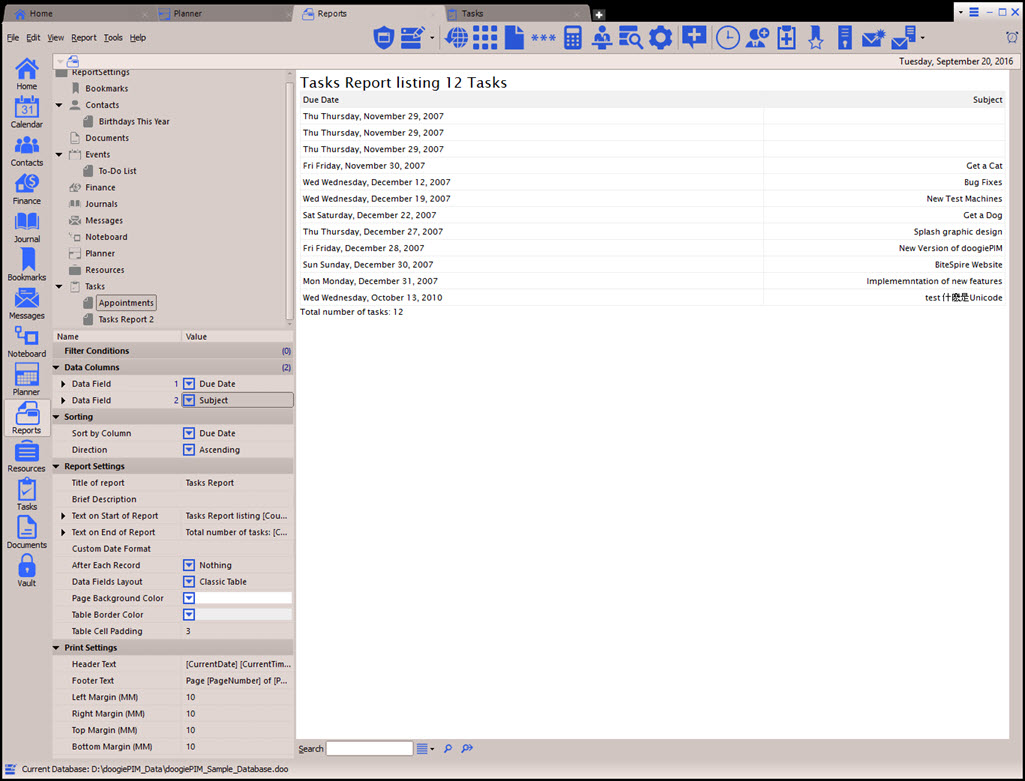
The layout of the Reports section is similar to other sections. You have a navigator area where the Available Reports are located. This area is also used to add new reports, selecting reports and deleting unneeded reports. Each report you create is listed under its section type, eg: Contact reports are listed under the Contacts item, Tasks under Tasks, etc.
Under the Available Reports list, is the Report Parameters area. When you create a report or select a report, the parameter area is filled with a vertical list of two columns. On the left column is an item description and the right column is the value of that item. These items control the aspects of the selected report. eg: to change the title of the report you would navigate to the Report Settings area in the Report Parameters, open or expand it, then look at the "Title of report" item. Click on the second column next to the item to start editing the title.
Some items in the Report Parameters cannot be edited directly but require you to select from a list of values. eg: the "Sort by column" item requires you select a data field. Click on the drop-down arrow next to the item you want to change. A list will pop up where you select the item just like a right click context menu.
On the right side of the Reports section is the preview area. When you run a report, the results are shown here. After the report is shown, you can select any of the text, export or print it. There may be times when you want to export your report with your own logo on the top or you wish to change background colors of the tables. In this case, you can click on the command "Edit in doNotes" where you have complete control over the formatting.
For more information about formatting and editing, see Notes Editor.
To view or manipulate the Reports, in doogiePIM, can only be done when in the Reports section.
To Go To The Reports Section
Either:
Choose from the Main Menu "File/Go To Section/Reports", or
Click on the Main Section Toolbar icon:
![]() Reports
Reports
Related Topics